Tag: defensive systems

What Is Defensive-Zone Coverage in Hockey? | IHM

IHM Knowledge Center

What Is Defensive-Zone Coverage in Hockey?

How do teams defend inside their own zone, and what systems prevent opponents from creating high-danger scoring chances?

Editor: Coach Mark • Updated: April 19, 2026

Short Answer

Defensive-zone coverage is the structured positioning and movement of players in their own zone to protect the net, control space, and limit high-quality scoring opportunities.

Full Explanation

Defensive-zone coverage refers to how a team organizes its players when defending inside its own zone. Unlike transition defense, this phase focuses on structure, positioning, and rotations rather than speed.

The main objectives are:

  • Protect the slot and net-front area
  • Control rebounds and second chances
  • Close passing lanes
  • Clear the puck safely out of the zone

Teams rely on systems to ensure all defensive responsibilities are covered at all times.

Zone Coverage vs Man-to-Man Coverage

There are two primary defensive-zone systems:

Zone coverage: Players defend specific areas rather than individual opponents, focusing on space control.

Man-to-man coverage: Each defender is responsible for a specific opponent, following them throughout the zone.

Most modern teams use hybrid systems that combine both approaches depending on the situation.

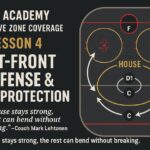
Slot Protection and Net-Front Control

The most important area in defensive-zone coverage is the slot.

This is where the highest-quality scoring chances are created.

Defenders prioritize:

  • Blocking access to the slot
  • Clearing rebounds
  • Controlling screens in front of the goalie

If the slot is exposed, the probability of conceding a goal increases significantly.

Defensive Rotations and Communication

Defensive-zone coverage is dynamic and requires constant movement.

Players rotate based on puck movement:

  • Defensemen switch coverage when puck moves low to high
  • Forwards collapse to support in the slot
  • Players communicate to avoid leaving attackers open

Poor communication leads to missed assignments and open scoring chances.

Why These Decisions Are Controversial

Fans often criticize defensive-zone coverage when goals are scored.

Common misunderstandings include:

  • Why defenders leave players open at the point
  • Why players collapse toward the net instead of chasing the puck
  • Why teams allow perimeter shots

In reality, these are strategic decisions designed to protect the most dangerous areas.

Edge Case: Broken Coverage Under Pressure

A key edge case occurs when defensive coverage breaks down under pressure.

This can happen due to:

  • Extended time in the defensive zone
  • Fatigue and slow rotations
  • Missed assignments

Once structure collapses, attackers can exploit open space quickly, leading to high-danger chances.

IHM Signal System: Reading Defensive Coverage

To analyze defensive-zone coverage in real time, focus on these signals:

  • Slot signal: Is the slot protected or exposed?
  • Rotation signal: Are players switching assignments correctly?
  • Pressure signal: Is the puck carrier being pressured or allowed time?

Trigger-level rule:

If the slot becomes exposed or rotations break down, the likelihood of conceding a goal increases immediately.

IHM Insight: The Real Goal of Defensive Coverage

The purpose of defensive-zone coverage is not to stop all shots.

It is to control where shots come from and reduce their quality.

Elite teams allow low-danger shots from the outside while protecting the slot and net-front area.

Understanding shot quality is key to evaluating defensive performance.

Mini Q&A

What is defensive-zone coverage?
It is the structure used to defend inside the defensive zone.

What is zone coverage?
Defending space rather than specific players.

What is man-to-man coverage?
Defending individual opponents.

Why is the slot important?
It is the highest-danger scoring area.

What happens when coverage breaks down?
It creates high-quality scoring chances.

Why This Rule Exists

Defensive-zone coverage systems exist to create structure, reduce chaos, and manage defensive responsibility effectively under pressure.

Key Takeaways

  • Defensive-zone coverage protects the slot and net
  • Zone and man systems are often combined
  • Rotations and communication are critical
  • Shot quality matters more than shot volume
  • Structure breakdown leads to scoring chances

What Is a Neutral-Zone Trap in Hockey? | IHM

IHM Knowledge Center

What Is a Neutral-Zone Trap in Hockey?

How do teams slow down fast opponents before they even enter the offensive zone, and why is the neutral zone trap so difficult to break?

Editor: Coach Mark • Updated: April 19, 2026

Short Answer

A neutral-zone trap is a defensive system where players are positioned in the neutral zone to block passing lanes, limit speed, and force turnovers before the opponent can enter the offensive zone.

Full Explanation

The neutral zone trap is designed to control the middle of the ice and prevent clean zone entries. Instead of pressuring deep, teams set up a structured formation that slows the game down.

The system focuses on:

  • Clogging passing lanes
  • Forcing dump-ins instead of controlled entries
  • Reducing speed through the neutral zone
  • Creating turnovers for counterattacks

It is a control-based system, not a pressure-based one.

The 1-2-2 Trap Structure

The most common neutral-zone trap is the 1-2-2 formation:

  • 1 forward applies light pressure on the puck carrier
  • 2 players form a line across the neutral zone to block passing lanes
  • 2 defensemen stay deeper to protect against breakouts

This structure creates a layered defense that is difficult to penetrate.

How the Trap Disrupts Offense

The trap forces the attacking team into uncomfortable decisions:

  • Carrying the puck becomes risky
  • Passing lanes are limited
  • Speed is reduced

As a result, teams are often forced to dump the puck into the offensive zone, giving up possession.

Trap vs Aggressive Forecheck

The neutral-zone trap is often compared to aggressive forechecking systems.

Trap: Focuses on control, positioning, and forcing mistakes.

Aggressive forecheck: Focuses on pressure and puck retrieval deep in the offensive zone.

Each system reflects a different coaching philosophy.

Why These Decisions Are Controversial

The neutral-zone trap is one of the most controversial systems in hockey.

Criticism includes:

  • Slowing down the game
  • Reducing offensive creativity
  • Making games less entertaining

However, it is highly effective, especially against faster or more skilled opponents.

Edge Case: Breaking the Trap with Speed

A key edge case occurs when teams attempt to break the trap using speed.

This requires:

  • Quick puck movement
  • Support from multiple players
  • Timing and spacing

If executed correctly, teams can bypass the trap and create odd-man rushes.

If executed poorly, they turn the puck over immediately.

IHM Signal System: Reading the Trap

To recognize a neutral-zone trap, focus on these signals:

  • Layer signal: Are players positioned in lines across the ice?
  • Pressure signal: Is pressure light or aggressive?
  • Lane signal: Are passing lanes closed?

Trigger-level rule:

If the attacking team is forced into dump-ins repeatedly, the trap is working effectively.

IHM Insight: Why the Trap Still Works

Despite rule changes and faster gameplay, the trap remains effective because it targets fundamental weaknesses in puck control and spacing.

It forces teams to make decisions under pressure without giving them space to execute clean plays.

Even elite offensive teams struggle against well-executed trap systems.

Mini Q&A

What is a neutral-zone trap?
It is a defensive system used to control the neutral zone.

What is the most common trap formation?
The 1-2-2 formation.

Why is it effective?
It limits speed and blocks passing lanes.

How do teams beat the trap?
With speed, quick passing, and support.

Why is it controversial?
Because it slows the game down.

Why This Rule Exists

The neutral-zone trap exists as a tactical option that allows teams to control tempo and neutralize stronger opponents through structure and discipline.

Key Takeaways

  • The trap controls the neutral zone and limits speed
  • 1-2-2 is the most common structure
  • It forces dump-ins and turnovers
  • It prioritizes control over pressure
  • Execution determines effectiveness
IHM Academy · Defensive Zone Coverage-Lesson 4

IHM Academy · Defensive Zone Coverage-Lesson 4

By Coach Mark Lehtonen · IHM Academy · Defensive Zone Coverage

IHM Academy – Defensive Zone Coverage · Lesson 4: Net-Front Defense & Slot Protection

The defensive zone does not break first on the boards - it breaks in the slot.

Teams that lose the middle of the ice give up screens, tips, and rebounds no system can survive. Net-front defense and slot protection are the backbone of every coverage. If the house stays strong, the rest of the structure can bend without breaking.

In this lesson we build clear rules for how defenders and forwards protect the blue paint, manage sticks, and control body position when the puck is high, low, or on the move.

IHM Academy - Defensive Zone Coverage · Lesson 4: Net-Front Defense & Slot Protection

🎯 Core Objectives

  • Keep the middle of the ice sealed in all coverages (box+1, overload, switch systems).
  • Establish simple, repeatable rules for who owns the net-front at every moment.
  • Teach defenders how to battle without taking unnecessary penalties.
  • Control sticks first, then bodies, then rebounds.
  • Turn net-front wins into clean exits instead of second and third chances.

🧠 Net-Front Role Definitions

1. D1 – Primary Net-Front Defender

  • Owns the space from the top of the crease to the low slot.
  • Plays inside position: body between attacker and goalie at all times.
  • Eyes on chest, stick under the attacker’s hands, not chasing the puck.
  • Finishes every shot sequence with a box-out and a quick shoulder check.

2. D2 – Support & Box Help

  • Stays one step above D1, ready to help on rebounds or second net-front attackers.
  • Protects the high slot when the puck is low, closes to the crease when it rises.
  • Responsible for “second touch” - clearing loose pucks after the first save.

3. Center – Slot Security

  • Is the first forward responsible for the middle lane.
  • Tracks late slot entries from opposing centers and high forwards.
  • Communicates switches when wingers are pulled down or inside.

4. Wingers – Inside-Then-Out

  • When the puck is high, start inside the dots before closing to the point.
  • If beaten inside, collapse to help on the slot rather than chasing wide.
  • On shot release, box out their side-lane attacker and look for loose pucks.

🔧 Technique – How to Defend the Net Front

Body Position

  • Feet outside the opponent’s skates, hips between attacker and goalie.
  • Stick blade on the ice in front of the attacker’s blade, not behind.
  • Shoulders low, legs loaded - ready to handle bumps without losing balance.

Stick & Hands

  • “Stick first” - lift, pin, or tie up before delivering contact.
  • Hands stay inside the frame; avoid wrapping arms around the opponent.
  • After shot release, attack the attacker’s stick for tips and rebounds.

Box-Out Timing

  • Engage early when the puck moves high - don’t wait on the crease.
  • Drive the attacker out of the blue paint, then hold ice, not the jersey.
  • Release contact quickly when your team gains possession to avoid penalties.

📊 Read Structure by Puck Location

Puck High at the Blue Line

  • D1 locks net-front attacker; sticks and screens managed first.
  • D2 protects mid-slot and is ready to step into shooting lane.
  • Center shades toward the high slot to deny bumper and seam plays.
  • Wingers stay inside dots, then close to their points on the pass.

Puck Low Below the Goal Line

  • D1 fronts the net-front attacker, not the puck carrier.
  • D2 supports behind or beside the net battle depending on system rules.
  • Center collapses to the middle to protect the “royal road” pass.
  • Weak-side winger slides into the hashmarks to help on backdoor threats.

Puck in the Slot or on Net-Front Scramble

  • All defenders collapse inside hashmarks with sticks sweeping inside-out.
  • Priority order: 1) sticks, 2) bodies, 3) loose puck, 4) exit.
  • First touch clears the danger area, even if it means an icing when under heavy pressure.

💬 Coach Mark Lehtonen says

If we own the blue paint, we can survive bad shifts. If we lose the blue paint, even good structure breaks.

Net-front defense is not about cross-checks. It’s about inside feet, strong sticks, and winning the first rebound.

❌ Common Mistakes & Consequences

MistakeWhy it breaks coverage
D1 plays puck, not bodyScreen and tip are uncontrolled; goalie never sees the shot
Center cheats low boardsHigh slot opens; one-timers from the middle become automatic chances
Late box-out on shot releaseAttacker already set inside; defender is chasing from behind and takes penalties
Wingers defend outside the dotsInterior lanes open, weak-side sticks are free on backdoor plays
Poor rebound decisionsPuck cleared into traffic instead of corners, leading to extended pressure

🧪 Micro-Drills & Coaching Cues

  • 1v1 Net-Front Battle Ladder: D1 vs. net-front forward, shots from the point, focus on stick ties and early box-out.
  • 2v2 Low & Net-Front: Puck starts below the goal line; D1 and D2 communicate who owns net-front, who supports the puck.
  • Rebound Clear Drill: Coach shoots from the blue line; defenders must box out, win first touch, and clear to safe lanes within two seconds.
  • Center Slot Read Drill: Centers start high, track late slot entries, and arrive inside the offensive player at shot release.

Q&A – Defensive Zone Coverage

Q1: What matters more – moving the attacker or clearing sightlines for the goalie?

A: They are connected. If you win inside position early, you remove both the screen and the inside stick. When you are late, don’t chase the hit - first fight to open the goalie’s eyes, then move the attacker out of the crease.

Q2: Should defenders cross-check in front of the net?

A: Controlled bumps are fine; constant cross-checks are not. We teach “lift, bump, hold inside ice” - strong posture and stick work instead of reckless force that leads to penalties.

Q3: How do smaller defensemen survive net-front battles?

A: With feet and leverage. Get under the attacker’s hands, win inside lane early, and use quick bumps and stick lifts. Smaller D who arrive first with good angles often win more net-front battles than big D who arrive late and upright.

Q4: Where should the first rebound go?

A: Out of the house – into the corners or behind the net. Middle ice is never an option. The first touch doesn’t need to be pretty; it just needs to remove the immediate scoring threat.

🧱 Summary

Net-front defense and slot protection are the insurance policy of every defensive-zone system. When your team owns the blue paint with clear roles, strong sticks, and disciplined body position, you turn dangerous shots into one-and-done chances instead of extended chaos.

Systems may change from year to year – box+1, overload, rotations - but the rule stays the same: the middle never breaks.

Backchecking vs. 2-on-1 - Defensive Recovery Principles | IHM Academy (Coach Mark Lehtonen)

IHM Academy - Lesson #5 · By Coach Mark Lehtonen · IHM Academy

Backchecking vs. 2-on-1 – Defensive Recovery Principles

Backchecking vs. 2-on-1 - Defensive Recovery Principles

Every transition has a heartbeat – the moment when an offensive rush turns into a defensive emergency. The 2-on-1 rush is the most dangerous situation in hockey, and how you manage it defines your team’s defensive identity. A well-executed backcheck can turn what looks like a guaranteed scoring chance into nothing more than a dump-in.

Objective

The goal of an effective backcheck against a 2-on-1 is to neutralize the secondary attacker before the puck crosses the defensive blue line. That requires instant recognition, clear communication, and synchronized effort between the lone defenseman and the tracking forward.

Structure and Communication

  • Recognition: The defenseman must immediately identify that support is coming from behind. The earlier they know a backchecker is present, the sooner they can close the gap on the puck carrier.
  • Communication: A quick, loud call – “I’ve got puck!” or “You’ve got weak side!” – eliminates confusion. The defender commits to the puck carrier while the backchecker locks onto the trailer.
  • Gap Control: The defenseman’s stick must take away the middle of the ice. By controlling the passing lane early, the puck carrier is forced wide or into a low-percentage shot.

Backchecker Responsibilities

  • Skate through the middle: The backchecker must attack with speed through the center lane. Their feet never stop until they are goal-side of the weak-side forward.
  • Stick on stick: Arriving late is fine – arriving lazy isn’t. The backchecker must eliminate the weak-side player’s stick immediately to deny any pass or rebound.
  • Read the defenseman’s body: If the defender angles the puck carrier outside, the backchecker closes inside. If the defense steps up early, the backchecker supports from behind to recover loose pucks.

Defender’s Tactics

  1. Close the gap early: Once the defender knows there’s support coming, they can step up on the puck carrier confidently.
  2. Stick positioning: Blade flat to the ice, inside-out angle – the goal is to make the pass across impossible.
  3. Force to the boards: Keep body between puck and net, forcing a shot from a poor angle.

Transition Mindset

Great backchecking is not about speed – it’s about *commitment*. The moment your forwards realize the play has turned, their first three strides must be full effort backward. The earlier they engage, the easier it is for the defenseman to control space. A disciplined team transforms broken plays into controlled recoveries.

Coach Mark Lehtonen says:

“Every 2-on-1 starts as a 3-on-2 that died. You kill it by effort and communication. The backchecker doesn’t save the day – he erases the mistake before it becomes one.”

Summary

Backchecking versus a 2-on-1 is about unity. The defenseman controls space; the backchecker controls the weak side. Together, they turn panic into control. When both players trust the system, the 2-on-1 becomes just another rush – not a highlight reel against you.

Learn more defensive transition tactics and recovery reads at IHM Academy.


Elite Offensive Structure, Forecheck & Neutral Zone Systems

Elite Offensive Structure, Forecheck & Neutral Zone Systems

Elite Offensive Structure, Forecheck & Neutral Zone Systems

A complete pro-level module covering modern offensive structure, forechecking systems, neutral-zone tactics, transition principles, and elite special teams concepts. All lessons are authored in the signature style of Coach Mark Lehtonen for the IHM Academy.


Power Play Overload → Umbrella Rotation By Coach Mark Lehtonen · IHM Academy

IHM Academy - Lesson #11 · By Coach Mark Lehtonen


Cinematic hockey banner of an east-west deceptive cycle with metallic IHM Academy Lesson #10 title

IHM Academy - Lesson #10 · By Coach Mark Lehtonen


Cinematic hockey banner showing a neutral-zone turnover exploding into counter-attack, with metallic title IHM Academy - Lesson #9

IHM Academy - Lesson #9 · By Coach Mark Lehtonen


IHM Academy - Lesson #8 Neutral Zone Face-Off Loss

IHM Academy - Lesson #8 By Coach Mark Lehtonen


IHM Academy - Lesson #7 Neutral Zone Face-Off Win - Lane Activation & Speed Release

IHM Academy - Lesson #7 By Coach Mark Lehtonen


Gap Control & Angling - Controlling Speed and Space | IHM Academy (Coach Mark Lehtonen)

IHM Academy - Lesson #6 By Coach Mark Lehtonen


Backchecking vs. 2-on-1 - Defensive Recovery Principles | IHM Academy (Coach Mark Lehtonen)

IHM Academy - Lesson #5 · By Coach Mark Lehtonen

IHM ACADEMY - LESSON #4 DESIGNING OFFENSE FROM THE DRAW THE CIRCLE ATTACK SYSTEM BY COACH MARK LEHTONEN

IHM Academy - Lesson #4 By Coach Mark Lehtonen


Penalty Kill Forecheck Explained - IHM Academy by Coach Mark Lehtonen

IHM Academy – Lesson #3 By Coach Mark Lehtonen


HM Academy - Lesson #2’ and ‘Neutral Zone Forecheck · 1-2-2’.By Coach Mark Lehtonen

IHM Academy - Lesson #2 By Coach Mark Lehtonen


2-1-2 forecheck hockey system diagram - IHM Academy by Coach Mark Lehtonen.

IHM Academy - Lesson #1 By Coach Mark Lehtonen