By Coach Mark Lehtonen · IHM Academy · Defensive Zone Coverage
IHM Academy – Defensive Zone Coverage · Lesson #6
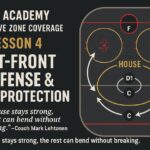
Weak-Side Awareness & Backdoor Protection
The weak side decides games. Teams defend well on the puck side because it’s visible, loud, and instinctive. But goals are scored behind your structure – on delayed seams, weak-side pinches, and backdoor timing routes.
Elite defenders defend both sides of the ice simultaneously. Their head is on a swivel, their stick covers the lane, and their feet stay inside-out. Weak-side awareness is not a luxury – it’s a system requirement.

🎯 Objective
- Eliminate backdoor threats
- Reduce weak-side slot collapses
- Improve scanning frequency and shoulder checks
- Build automatic inside-out habits on puck rotations
- Prevent weak-side defenders from getting “lost” behind coverage
🧠 Core Concepts
1. Head on a Swivel
The most important skill of weak-side defending is continuous scanning. Elite defenders scan every 1-1.5 seconds until threats are identified.
- Check middle → check point → check net-front
- Never stare at the puck on the strong side
- Scan before rotations, not after breakdowns
2. Inside-Out Positioning
The defender must stay between the weak-side attacker and the net.
- Feet inside dots
- Stick in the passing lane
- Hip-to-hip on collapse rotations
Inside-out prevents the attacker from getting body position for a tap-in.
3. Backdoor Timing Reads
- Watch opponent’s weak-side D pinch pattern
- Recognize “delay passes” from below goal line
- Track the far-side F driving backside post
- Identify when puck-carrier turns his feet toward backdoor lane
4. Weak-Side Winger Job
First responsibility: middle ice, not the point.
- Protect inside lane before jumping high
- Read if puck is about to rotate D-to-D
- No chasing when your D1 is engaged low
- Collapse early on backdoor drivers
5. Defensemen Responsibilities
- D1: Stay net-front; eliminate stick; read backside pressure
- D2: Control low-lane; stay connected to D1 on switches
- No blind chases behind the net
- Stick must stay in seam – not above hands, not sweeping
🔧 Bench / On-Ice Calls
- “Middle!” - keep weak-side winger inside
- “Backdoor!” - D1 tightens low support
- “Switch!” - D1/D2 hand off weak-side cutter
❌ Common Mistakes
| Mistake | Why it hurts coverage |
|---|---|
| Weak-side winger jumps high early | Opens center lane → backdoor tap-in |
| D1 ball-watching on strong side | Loses backside stick → redirect goal |
| No scanning | Weak-side attacker becomes “invisible” |
| D2 chases outside the dots | Gives attacker inside body position |
💬 Coach Mark Lehtonen says
Strong-side pressure forces plays. Weak-side awareness kills plays.
Backdoor goals are not talent issues – they are attention issues. Scan or get punished.
🧪 Micro-Drills
- Weak-side shoulder-check timing drill
- Backdoor cut recognition sequences
- D-to-D rotation with winger collapse reps
- Inside-out positioning footwork circuit
🧱 Summary
Weak-side awareness is the antidote to backdoor goals. With structured scanning habits, inside-out positioning, and disciplined winger reads, teams shut down far-side attacks and eliminate tap-in threats. Strong-side pressure wins battles – weak-side awareness wins games.
Q&A – Defensive Zone Coverage
Q1: Why is weak-side awareness more important at higher levels?
A: Because elite offenses hunt backdoor lanes. They know that one defender losing inside positioning on the weak side creates an uncontested tap-in. The higher the level, the faster these reads happen.
Q2: What causes most backdoor breakdowns?
A: Weak-side players ball-watching. When W2 or D2 stare at the puck instead of maintaining inside-out body position, attackers slip behind them and receive uncontested passes.
Q3: Should the weak-side winger chase the point immediately?
A: No. The middle comes first. You jump to the point only after the slot and backdoor are secure. Good teams give up low-danger point shots before they ever give up the backdoor.
Q4: How do defensemen support weak-side protection?
A: D1 and D2 must communicate constantly – “Middle!”, “Inside!”, “Switch!”. D1 holds strong-side net-front, D2 protects weak-side lanes. If one defender overcommits, the other fills inside.
Q5: What is the golden rule of backdoor protection?
A: Inside-out positioning. If you stay between your man and the net, the pass cannot hurt you. Lose the inside, and the play becomes uncontrollable.