Category: IHM Academy

IHM Academy by Coach Mark Lehtonen is your ultimate destination for learning the game like a pro.
From tactical systems and line matchups to training methods and mental preparation - every lesson is built on real coaching experience.
Dive into the fundamentals, master advanced hockey IQ, and understand the game through the eyes of a coach.

📚 Learn Hockey. The Coach’s Way.

IHM Academy · Performance Metrics Masterclass - Lesson 9

IHM Academy · Performance Metrics Masterclass – Lesson 9

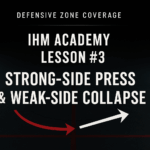
Performance Metrics Masterclass – Lesson 9: Score Effects & Game State Metrics

Teams do not play the same way at 0-0 as they do with a 3-0 lead. Systems tighten, risk levels change and shot patterns shift. Score effects describe how performance metrics move depending on the game state – tied, leading or trailing.

If you ignore game state, you can misjudge both teams and players. A club that looks dominant by shot share might simply be chasing deficits every night. Another that looks passive may be protecting leads by design.

🎯 Objectives of Game State Analysis

  • Isolate how a team plays when the game is close (true strength).
  • Understand how strategies change when leading or trailing.
  • Measure whether a team can protect leads without collapsing.
  • Identify which players thrive in “push” situations vs. protect-mode hockey.

🧠 Key Concepts

1. Close-Game Metrics

Analytics departments often focus on numbers in “close situations” (for example, tied or within one goal in the first two periods):

  • xGF%, Corsi% and shot share at 5-on-5 in close games.
  • Chance count when score is within one.

These metrics best reflect a team’s true playing level when neither side is in extreme risk mode.

2. Leading vs. Trailing Profiles

  • When leading: some teams sit back and allow heavy shot volume; others keep puck pressure while managing risk.
  • When trailing: elite teams increase chance generation without completely abandoning structure.

By splitting metrics by game state, you see whether a team can switch gears effectively.

3. Individual Game State Impact

Some players are natural “closers”; others are built for chase mode. You can track:

  • On-ice xGF/xGA when leading vs. trailing.
  • Which forwards drive late-game pushes.
  • Which defenders stabilize leads without collapsing.

4. Score-Adjusted Metrics

Score-adjusted shot metrics reweight events to account for score effects. They reduce the bias of teams that are always chasing or always protecting and give a cleaner view of territorial play over the season.

💬 Coach Mark Lehtonen says

Some teams only play their best hockey when they are desperate. Elite teams control games before they get desperate.

You don’t just want good numbers - you want good numbers when the game is on the line.

❌ Common Mistakes

MistakeWhy it misleads
Using season-long shot share without game-state splitsOverrates teams that chase scores, underrates teams that protect leads early
Judging players only by overall xG%Hides who excels in clutch, close-score minutes
Assuming “parking the bus” is always safeSome teams bleed too many chances when they sit back with a lead
Ignoring how systems change late in gamesMisses coaching tendencies that matter for playoff and betting edges

🧪 Micro-Assignments

  • Split one team’s 5-on-5 xGF% into: leading, tied and trailing. How different are they?
  • Identify one “closer” forward who improves metrics when protecting a lead.
  • Track a team that blows leads often and see if its shot share collapses when ahead.

Q&A – Coach Mark Lehtonen

Q1: Why are close-game metrics so important?

A: Because they filter out extreme score effects and show how strong a team is when both sides are still playing their normal systems.

Q2: Can a team with average overall numbers still be dangerous?

A: Yes. A club might be average overall but excellent in close games, with most damage coming from a few blowout losses or empty-net situations.

Q3: How do score effects help betting and prediction?

A: They show which teams can protect leads and which ones crumble, which is critical for live betting, series predictions and in-game strategy.

Q4: How should coaches use game-state metrics?

A: To evaluate whether their protect-mode is too passive, which line should close games, and whether they need different tactics when chasing vs. defending a lead.

🧱 Summary

Score effects and game state metrics put every stat in context of the scoreboard. They reveal who drives play when it matters most, which systems hold under pressure and how teams really perform in the moments that decide seasons.


https://icehockeyman.com/2025/11/23/ihm-academy-%c2%b7-performance-metrics-masterclass-lesson-8/
IHM Academy · Performance Metrics Masterclass - Lesson 8

IHM Academy · Performance Metrics Masterclass - Lesson 8

Performance Metrics Masterclass – Lesson 8: Usage & Deployment Metrics (Zone Starts, Quality of Competition & Teammates)

Numbers never live in a vacuum. A player’s results are shaped by how he is used: who he plays with, who he plays against, and where his shifts start. Usage and deployment metrics explain why some players post huge numbers in sheltered roles while others quietly survive the hardest assignments in the league.

If you ignore deployment, you misread the story the data is telling you.

🎯 Objectives of Usage Analytics

  • Understand how coaches trust and deploy each player.
  • Separate production driven by easy minutes from production earned in tough minutes.
  • Identify shutdown pairs, matchup centers and sheltered scorers.
  • Spot misused players whose skill set doesn’t match their deployment.

🧠 Key Concepts

1. Zone Starts

  • Offensive Zone Start %: share of shifts starting in the offensive zone.
  • Defensive Zone Start %: share of shifts starting in the defensive zone.
  • Neutral Zone Starts: help stabilize context around center-ice faceoffs.

High offensive zone starts usually mean sheltered scoring usage. Heavy defensive zone starts signal trust in a player’s defensive reliability.

2. Quality of Competition (QoC)

QoC metrics estimate how strong the opponents are when a player is on the ice, using measures like TOI, xG impact or game score of opposing skaters.

  • High QoC → top-line matchups, heavy minutes vs. best players.
  • Low QoC → softer minutes vs. depth lines.

3. Quality of Teammates (QoT)

QoT describes the strength of a player’s own linemates and defense partners. A winger riding shotgun with an elite center will naturally post better on-ice metrics than a winger driving a weak line by himself.

4. Matchup & Role Profiles

  • Matchup centers: high QoC, lower OZ starts.
  • Offensive drivers: high OZ starts, strong linemates, heavy PP usage.
  • Energy or depth lines: heavy NZ starts, mixed QoC, specific micro-roles.

💬 Coach Mark Lehtonen says

Usage is the context of every number. A 45% expected goal share against top lines can be elite work. The same 45% against depth lines is a problem.

Before you praise or criticize a player’s stats, ask: who did he play with, and who did he play against?

❌ Common Mistakes

MistakeWhy it misleads
Comparing raw numbers across rolesShutdown players will never match sheltered scorers in points or shot share
Ignoring zone starts when judging xG%Heavy DZ usage drags results down but reflects trust, not failure
Blaming one player for a weak lineQoT might show he is carrying much weaker teammates
Overrating players with soft QoCThey might feast on depth but struggle when promoted

🧪 Micro-Assignments

  • Pick a “shutdown” forward and compare his zone starts and QoC to a pure scorer on the team.
  • Look at one defender’s QoT – does he play with top forwards or depth lines?
  • Track how usage changes when injuries force different roles and how results follow.

Q&A – Coach Mark Lehtonen

Q1: Why do some strong defensive players have weak shot-share numbers?

A: Because they start more shifts in the defensive zone and face top opposition. Usage metrics explain why their numbers are “dragged down” by context.

Q2: Can a player’s stats improve just by changing usage?

A: Absolutely. Moving a player from heavy DZ starts to balanced usage or giving him stronger linemates can transform his underlying metrics.

Q3: How should fans factor deployment into evaluation?

A: Always look at zone starts, QoC and QoT alongside xG% or Corsi. A 50% share in hard minutes can be more impressive than 55% in soft minutes.

Q4: What do usage metrics tell coaches?

A: They show whether the current deployment matches each player’s strengths and if adjustments could unlock better performance or fix matchup problems.

🧱 Summary

Usage and deployment metrics translate coaching decisions into numbers. They reveal who is trusted with the hardest jobs, who is sheltered to score, and where role changes might unlock more value. Without usage context, any evaluation is incomplete.


https://icehockeyman.com/2025/11/23/ihm-academy-%c2%b7-performance-metrics-masterclass-lesson-7
IHM Academy · Performance Metrics Masterclass - Lesson 7

IHM Academy · Performance Metrics Masterclass – Lesson 7

Performance Metrics Masterclass – Lesson 7: Skater Impact Metrics (Isolated Impact, RAPM & Game Score)

Points don’t tell the full story. In modern hockey, some of the most valuable skaters drive play, tilt the ice and suppress chances without ever touching the scoresheet. That is why elite programs use impact metrics like isolated impact models, RAPM and game score to understand the true value of a player.

These metrics strip away noise from teammates, usage and luck. They aim to answer one key question:

“What happens to shot quality and game flow when this player is on the ice?”

🎯 Core Objectives of Skater Impact Metrics

  • Measure how a player influences xGF/xGA when on the ice.
  • Separate individual impact from linemates and deployment.
  • Identify undervalued drivers who help winning but don’t rack up points.
  • Flag players whose raw boxscore stats are driven by context, not true impact.

🧠 Key Concepts

1. On-Ice xGF/xGA Differential

  • xGF/60 on-ice: expected goals for when the player is on the ice.
  • xGA/60 on-ice: expected goals against in the same minutes.
  • xG differential: xGF/60 − xGA/60 – a simple impact snapshot.

Positive differential means the team is more likely to out-chance opponents with that player on the ice. Negative differential is a red flag, even if the player scores sometimes.

2. RAPM (Regularized Adjusted Plus-Minus)

RAPM models try to adjust for:

  • Teammates and opponents.
  • Zone starts and deployment.
  • Score effects and usage patterns.

The result is a set of numbers that estimate how much the player alone drives:

  • xGF (offensive shot quality).
  • xGA (defensive shot quality against).
  • Shot rates and expected goal rates relative to league average.

3. Isolated Impact Models

Isolated impact or “isolated threat” models visualize how a skater changes scoring chance patterns:

  • Red areas: locations where the team generates more threat with the player on the ice.
  • Blue areas: locations where the team allows less threat with the player on the ice.

This helps identify true offensive drivers, net-front specialists, blue-line shooters and defensive stoppers.

4. Game Score & Single-Game Impact

Game score compresses a player’s single-game contribution into one number using:

  • Goals and assists.
  • Shot attempts and chances.
  • Penalty differential.
  • On-ice shot metrics at 5-on-5.

Over time, average game score shows how consistently a player impacts results night after night.

💬 Coach Mark Lehtonen says

Points show who finished the play. Impact metrics show who created the play.

Smart teams pay for drivers, not passengers.

❌ Common Mistakes

MistakeWhy it’s a problem
Judging players only by pointsMisses defensive value, transition impact and play-driving
Ignoring context and deploymentOverrates players with easy minutes, underrates tough-matchup players
Looking at raw plus-minusHeavily influenced by luck, goaltending and team strength
Using one metric in isolationNo single model is perfect; decisions should blend multiple views

🧪 Micro-Assignments

  • Pick one player and track his on-ice xGF/xGA over 10 games; compare to his points.
  • Identify a “quiet driver” whose RAPM or isolated impact is strong despite low scoring.
  • Compare game score for a star who scores but leaks chances vs. a two-way driver.

Q&A – Coach Mark Lehtonen

Q1: Why aren’t points enough to evaluate a skater?

A: Points only capture finishing and last touches. Impact metrics show how a player affects shot quality, possession and chance flow over all his minutes, not just on scoring plays.

Q2: Are impact models perfect?

A: No metric is perfect. RAPM and isolated impact models are powerful tools, but they must be combined with video, role context and coaching judgment.

Q3: Can a player with low points still be elite by impact metrics?

A: Yes. Some players drive entries, retrievals and defensive stops that set the stage for others. Impact models often reveal these hidden engines.

Q4: How should fans start using these numbers?

A: Start with on-ice xGF/xGA differential, then add RAPM charts and isolated impact maps. Look for consistency across seasons before making strong conclusions.

🧱 Summary

Skater impact metrics turn raw events into a clearer picture of who truly drives winning. They adjust for context, separate passengers from drivers and help us find value that the boxscore hides. When you combine them with smart video, you start thinking like a modern front office.


IHM Academy · Performance Metrics Masterclass - Lesson 5

IHM Academy · Performance Metrics Masterclass – Lesson 6

Performance Metrics Masterclass – Lesson 6: Possession Chains & Puck Retrieval Metrics

Modern hockey is not just about who shoots more, but about who owns the puck longer in dangerous sequences. Possession is built in chains: recoveries, passes, attacks, rebounds, and pressure resets. Every time your team wins a puck and turns it into a sustained sequence, you are building a possession chain.

Puck retrieval metrics show who actually wins the right to attack again – after dump-ins, rebounds, blocked shots, broken plays, and loose pucks on the wall. Elite programs track these numbers shift by shift, player by player.

You don’t just want shots. You want repeated, connected possessions that suffocate the opponent.

🎯 Primary Objectives

  • Measure how often your team turns loose pucks into new possessions.
  • Identify players who extend offensive pressure through retrievals.
  • Understand which lines create multi-chance sequences, not one-and-done attacks.
  • Link retrieval metrics to xG chains, zone time, and fatigue on the opponent.

🧠 Key Concepts

1. Possession Chains

A possession chain is the full sequence from winning the puck to losing it again:

  • Recovery → pass → entry or cycle → shot → rebound / retrieval → second attack.

Instead of looking at a single shot, we look at the entire sequence and ask:

  • How many events (passes, shots, retrievals) did we create in this chain?
  • How much xG was generated across the whole sequence?
  • How long did we keep the puck before turning it over?

Teams with strong possession chains don’t just “take shots” – they live in the offensive zone.

2. Puck Retrieval Metrics

Retrievals are the glue that connect one action to the next. Key metrics:

  • Offensive Zone Retrieval % – percentage of dump-ins, rebounds and loose pucks your team recovers in the O-zone.
  • Defensive Zone Retrieval % – how often you win races to loose pucks in your own end and start a new exit.
  • Rebound Retrieval % – share of rebounds your forwards win after your first shot.
  • Wall Battle Win Rate – how often your players come out with the puck after contact on the boards.

These numbers show who keeps plays alive when the puck is up for grabs.

3. Chain Length & Quality

Not all chains are equal. We care about:

  • Average chain length (in events or seconds of puck possession).
  • xG per chain – how much expected offense each chain produces.
  • Multi-shot chain rate – percentage of chains that produce 2+ shots.

Longer, higher-quality chains wear down defenders, draw penalties, and create momentum swings.

🧩 Role Impact

Defensemen

  • Clean first touches after retrievals: off the glass is a last resort, not a habit.
  • Smart keep-ins at the blue line extend chains and pin the opponent.
  • Good gap and stick position in the neutral zone create easy retrievals for teammates.

Centers

  • Primary support on loose pucks in all three zones.
  • Turn retrievals into immediate middle-lane plays instead of safe dumps.
  • Drive the “second wave” after initial shots – arrive in time to win rebounds.

Wingers

  • First on the forecheck; first on the wall on dump-ins.
  • Win races and seal the inside lane during battles.
  • Turn 50/50 pucks into offensive starts, not defensive scrambles.

🔧 Core Metrics & What They Mean

  • O-Zone Retrieval % – ability to keep the attack alive after dump-ins and shots.
  • Rebound Retrieval % – pressure on the goalie and defense after the first shot.
  • Chain xG – how dangerous your average possession sequence is.
  • Multi-shot Chain Rate – indicator of sustained pressure, not one-and-done hockey.
  • Wall Battle Win Rate – physical and technical execution under pressure.

💬 Coach Mark Lehtonen says

“Great teams don’t play one-shot hockey.
They build waves of pressure from every loose puck.”

“If you can’t retrieve, you can’t attack twice.
The second chance is where playoff games are won.”

❓ Q&A – Possession & Retrieval

Q1: Why are puck retrieval metrics more informative than just shot counts?

A: Shot counts only show how many attempts you had, not how you got them. Retrieval metrics reveal whether your team can extend attacks, win second chances and live in the offensive zone. A team with fewer shots but elite retrieval and chain xG can be more dangerous than a volume team that plays one-and-done hockey.

Q2: Which players usually lead in retrieval metrics?

A: Often it’s not the top scorers but the “engine” players – strong-skating wingers, smart centers and mobile defensemen who read loose pucks early. They may not finish every play, but they give your scorers extra chances by extending chains.

Q3: How can a coach improve O-zone retrieval %?

A: Focus on routes and timing on the forecheck, not just effort. F1 drives the puck, F2 reads the wall, F3 protects the middle. Teach players to seal the inside, keep sticks in lanes and react as a unit when the puck is chipped or blocked. The earlier the read, the easier the win.

Q4: How do these metrics help with scouting and player evaluation?

A: Retrieval and possession-chain data identify players who drive winning hockey even without big point totals. A winger who consistently wins pucks back and extends sequences can be more valuable than a scorer who disappears when the puck is contested.

❌ Common Mistakes

MistakeConsequence
Watching the shot instead of reading the reboundOpponents win easy clears and kill momentum
Flying past the play on the forecheckNo inside position; 50/50 pucks become 30/70
Defensemen defaulting to rims under light pressureLost possession chains and uncontrolled exits
Forwards circling high instead of stopping on pucksLost battles on the wall; no second chances
No tracking of retrieval metricsCoaches misjudge effort vs. actual possession impact

🧪 Micro-Drills

  • Rebound Hunt Drill – shot from the point, two forwards vs. two defenders battle for every rebound; track retrieval %, not just goals.
  • Dump-In Retrieval Race – structured dump with F1/F2/F3 routes; scoring only counts if the puck is retrieved and a second shot is created.
  • Wall Battle into Cycle – 1v1 or 2v2 on the boards; winner must make a play off the wall to extend the chain, not just clear.

🧱 Summary

Possession chains and puck retrieval metrics explain why some teams feel relentless. They win loose pucks, extend sequences and attack in waves. When you track and train these details, you move from counting shots to controlling the game.

You don’t just want the first chance. You want the next one, and the one after that.


IHM Academy · Performance Metrics Masterclass - Lesson 5

IHM Academy · Performance Metrics Masterclass – Lesson 5

Performance Metrics Masterclass – Lesson 5: Special Teams Efficiency (PP & PK)

By Coach Mark Lehtonen · IHM Academy

Special teams swing playoff series. In modern hockey, power play and penalty kill efficiency decide momentum, scorelines, and series outcomes. This lesson goes deeper than simple PP% and PK%, focusing on the metrics that explain why a unit is dangerous or vulnerable.

Zone entries, set-ups, and chance quality are at the core of elite special teams. Expected goals, entry success, clear rates, and shot maps reveal how a power play or penalty kill truly performs beneath the surface of raw conversion numbers.

You don’t need 60% possession to win. You need to be faster and cleaner in the moments that create possession and chances.

🎯 Primary Objectives

  • Convert defensive stops into possession-driven exits and clears.
  • Create controlled entries on the power play that evolve into structured attacks.
  • Reduce stall points and slow recoveries during special-teams transitions.
  • Build predictable support layers on both PP and PK.
  • Measure individual and team contribution to puck-movement efficiency.

🧠 Key Metrics for Special Teams

1. Expected Goals For per 60 (xGF/60) on Power Play

This measures the shot quality and volume your power play generates per 60 minutes with the man advantage. High xGF/60 usually means:

  • Shots from the middle of the ice and net-front.
  • One-timers from prime shooting locations.
  • Second-chance opportunities and rebounds.

A unit can have an average PP% but elite xGF/60, meaning the process is strong and results will usually correct over time.

2. Entry & Set-Up Success Rate on PP

Without clean entries, the power play never gets set. Entry & set-up success rate tracks how often the team:

  • Gains the zone with controlled possession.
  • Reaches its planned formation (umbrella, 1-3-1, overload, etc.).

Many failed entries equal two minutes wasted, no matter how good the in-zone structure looks on paper.

3. Shot Threat Map on PP

A shot threat map is a location-based model that shows where chances are generated on the power play. Elite units:

  • Attack from the middle slot and net-front.
  • Use cross-seam passes to create east-west movement.
  • Avoid “harmless” shots from the boards with no net-front traffic.

4. Expected Goals Against per 60 (xGA/60) on PK

xGA/60 on the penalty kill measures how much quality your PK actually allows. A strong unit:

  • Pushes shots to the outside.
  • Limits seam passes through the box or diamond.
  • Reduces second-chance rebound looks.

Even if a few goals go in during a short stretch, low xGA/60 tells you the defensive process remains solid.

5. Clear Rate & Failed Clear % on PK

Clear rate tracks the percentage of times the puck is successfully sent down the ice after a win or loose-puck recovery. Failed clear % tracks how often:

  • Clears are fanned on.
  • Clears are intercepted at the blue line.
  • Clears roll off the stick without distance.

Good PKs win battles and finish clears. Poor PKs repeatedly fail to clear and get stuck defending tired.

💬 Coach Mark Lehtonen says

A dangerous power play scares opponents.
An organized penalty kill steals their confidence.

❓ Q&A – IHM Performance Metrics – Special Teams Analytics

Q1: Why isn’t PP% enough to judge a power play?

A: PP% only shows conversion, not process. A unit can score off a short hot streak while generating poor looks, or dominate with high xGF/60 but run cold for a stretch. Metrics like xGF/60, entry success, and shot threat maps tell you whether the power play is built on repeatable habits.

Q2: What makes a good penalty kill in analytics terms?

A: Strong PKs keep xGA/60 low, force shots from the outside, and win races to clears. They pressure at the right time, control the middle, and execute clears with a high success rate. They might still allow goals, but the underlying process is strong and sustainable.

Q3: How important are entries for power play success?

A: Without clean entries, the power play never has a chance to operate. Repeated failed entries turn a two-minute advantage into a non-event. Teams with elite PP metrics typically have high controlled entry rates and reach their set formation quickly after crossing the blue line.

Q4: Can a team be elite at 5-on-5 but poor on special teams?

A: Yes, and those teams often underperform in the standings. A strong 5-on-5 club with weak PP and PK leaves goals and points on the table. Masterclass metrics highlight when special teams drag down otherwise excellent even-strength play and show where to focus coaching time.

🧱 Summary

Special teams efficiency is more than PP% and PK%. xGF/60, xGA/60, entry and set-up success, clear rates, and shot threat maps reveal whether your units are truly built to win. Dangerous power plays and organized penalty kills change playoff series-because they control the most critical two minutes on the clock.


Performance Metrics Masterclass - Lesson 4: Zone Entries, Exits & Transition Speed

IHM Academy · Performance Metrics Masterclass – Lesson 4

Performance Metrics Masterclass – Lesson 4: Zone Entries, Exits & Transition Speed

By Coach Mark Lehtonen · IHM Academy

In today’s game, puck possession isn’t won in the offensive zone – it’s won in transition.
Neutral-zone efficiency determines who dictates pace.
Controlled entries create offense; clean exits prevent momentum swings.
Transition speed is the glue that connects both.

Zone entries, exits, and transition speed are three of the most predictive metrics of scoring chances. They measure how quickly a team moves the puck from defense to offense, how efficiently it crosses blue lines, and how much control it maintains through these sequences. NHL analytics departments track these numbers obsessively – and for a reason.

You don’t need 60% possession to win.
You need to be faster and cleaner in the moments that create possession.


🎯 Primary Objectives

  • Convert defensive stops into possession-driven exits
  • Create controlled entries that evolve into structured attacks
  • Reduce “stall points” and slow recoveries in the neutral zone
  • Build predictable support layers during every transition
  • Measure individual and team contribution to puck-movement efficiency

This is where raw skating meets tactical intelligence.


🧠 Key Concepts

1. Controlled Exits

Clean exits = clean attacks.
Teams with high controlled exit percentages generate nearly double the expected goals per entry.

Indicators of elite exits:

  • First support option is available within 2 seconds
  • D-man does NOT rim unless under heavy pressure
  • Center connects low to provide a safety valve
  • Weak-side winger anticipates the release lane
  • No “dead stops” behind the net

If you break out slow, you enter slow.

2. Controlled Entries

Possession entries lead to:
✔ zone time
✔ shot quality
✔ sustained pressure
✔ layered attacks

Dump-ins can be useful, but controlled entries consistently produce higher xG.

Attributes of high-value entries:

  • Forward enters with speed
  • At least two passing options cross the line together
  • Weak-side forward is already inside the zone
  • Defenders are forced to back-off, not gap up

Entries with speed collapse defensive structure instantly.

3. Transition Speed

Transition speed is NOT raw skating speed.
It’s decision speed + support speed.

Measures include:

  • Time from turnover → first controlled pass
  • Time from DZ recovery → neutral zone possession
  • Length of “transition sequences”
  • Layer spacing during attacks

Transition speed reveals how “connected” the team is.


🧩 Role Breakdown

Defensemen

  • Quick first read
  • Middle-first philosophy
  • Avoid long holds unless resetting structure
  • Precision in early puck touches

Centers

  • Primary transition engine
  • Must be below the puck on exits, above it on entries
  • Best neutral-zone “spine” on the roster

Wingers

  • Anticipate lanes, not react to them
  • Stretch D on entries
  • Collapse to middle for exits
  • Support north-south flow

🔧 Metrics & What They Mean

  • Controlled Exit % → how often possession starts clean
  • Controlled Entry % → chance creation predictor
  • Transition Speed (sec) → tempo and decision-making
  • Regroup Turnover Rate → efficiency under pressure
  • Entry Denial % (defense) → defensive transition impact

These are the numbers that win playoff series.


💬 Coach Mark Lehtonen says

Transition isn’t about being fast – it’s about being connected.
Slow teams are disconnected teams.

If your exits are bad, your entries will be bad.
If your entries are bad, your offense will be bad.
The game starts in the zone you leave.


Common Mistakes

MistakeConsequence
Wingers fly too highNo support → forced dump
Center late on exitDefense stuck under pressure
D-man rimming too earlyTurnovers + lost possession
Slow neutral-zone regroupOpponent resets structure
Entry without layersOne-and-done attacks

🧪 Micro-Drills

  • 3-Lane Transition Relay - timing & lane discipline
  • D→C→W Exit Triangle - quick-support sequencing
  • Regroup Pressure Drill - fast decisions under squeeze
  • Controlled Entry Timing Series - layered attack entry

🧱 Summary

Zone entries, zone exits, and transition speed are the heartbeat of modern hockey.
If your team wins the transition game, you control pace, space, and momentum.

You don’t need elite talent to transition well.
You need structure, timing, and support that never dies.


❓ Questions & Answers | IHM Performance Metrics

What is a controlled zone exit?

A controlled zone exit is when a team leaves the defensive zone with possession, usually through a clean D→C→W sequence or a stretch option. It predicts stronger offensive transitions.

Why do controlled entries matter?

Because controlled entries create better shot locations, longer possessions, and higher expected goals compared to dump-and-chase plays.

How do you measure transition speed?

Transition speed is measured by timing how quickly a team moves from puck recovery to neutral-zone possession or from the neutral zone into a controlled entry.

What hurts transition the most?

Late support, long hesitation with the puck, poor lane timing, and a slow center on exits are the biggest killers of transition tempo.

What is the role of the center in transition?

The center acts as the primary support engine – low on exits, high on entries, creating constant connection between defense and forwards.


IHM Academy Performance Metrics Masterclass - Lesson 3

IHM Academy · Performance Metrics Masterclass – Lesson 3

Performance Metrics Masterclass – Lesson 3 : Zone Entry Efficiency & Controlled Breakout Success

By Coach Mark Lehtonen · IHM Academy

Elite teams don’t just skate fast – they move the puck through pressure with structure.
Zone entries and zone exits are the engine of modern hockey possession.
If you win these two phases, you control the game’s rhythm.

Lesson 3 walks you through the two most important possession metrics:

Performance Metrics Masterclass - Lesson 3 : Zone Entry Efficiency & Controlled Breakout Success

1️⃣ Controlled Zone Entries (CZE%)

A controlled entry = carrying the puck over the blue line or completing a pass to a teammate who crosses with possession.

Why it matters:
Carried or passed entries produce 3-5× more scoring chances than dump-ins.

Key components of a strong controlled entry:

Entry spacing – the puck carrier must have a passing lane AND a skating lane.

Width support – the weak-side forward stretches the gap.

Middle-lane drive – F2 pushes defenders back.

Timing – you attack when defenders’ feet are turned, not squared.

Deception – shoulder fakes, weight shifts, eye deception.

Elite players don’t attack the blue line –
they manipulate the gap until it breaks.

2️⃣ Breakout Success Rate (BO% – Controlled Exits)

A controlled breakout = exiting the defensive zone with puck control (carry or completed pass).

Why it matters:
Teams with a BO% above 48% spend significantly less time defending and generate +6-9 extra shots per game.

Core principles:

D1 escape deception – shoulder check → mislead → attack space.

D2 as a hinge – always behind play angle, never flat.

Center low support – early read, slow down to open the middle.

F1 wall timing – arrive at the boards with speed, never stationary.

F2 slash support – cut diagonally for high-percentage passing lanes.

Breakouts aren’t plays –
they’re pressure-management systems.

Entry → Exit → Entry Loop

Great teams maintain “momentum chains”:

Win breakout → controlled entry → offensive zone time → force tired defenders → repeat.

Bad teams break their own momentum by:

Throwing pucks away at the blue line

Forcing east-west passes under pressure

Using wingers standing still on the walls

Possession is not talent –
it’s structure, spacing, and timing discipline.

🧱 Summary

Zone entry efficiency = how you start the attack.
Breakout efficiency = how you survive pressure and restart the attack.
Together, they form the possession backbone of elite hockey.

💬 Coach Mark says

You don’t beat teams with rushes – you beat them with layers behind the rush.
Breakouts are chess. Entries are checkmate.

❓ Questions & Answers | IHM Performance Metrics

Q1: What is a controlled zone entry?
A1: Carrying or passing the puck over the offensive blue line with full puck control.

Q2: Why are controlled entries better than dump-ins?
A2: They generate 3-5× more scoring chances and allow immediate offensive structure.

Q3: What defines a good breakout?
A3: Clean, controlled puck exit using spacing, deception, and layered support options.

Q4: Which position is most important in breakouts?
A4: The center – their low support unlocks all passing lanes.

Q5: What is the biggest mistake during entries?
A5: Attacking defenders too early instead of manipulating the gap first.


IHM Academy · Performance Metrics Masterclass - Lesson 2

IHM Academy · Performance Metrics Masterclass – Lesson 2

Performance Metrics Masterclass – Lesson 2: Goaltending Performance & Shot Suppression

In modern hockey you cannot judge a goaltender by raw save percentage and “how it looked on TV”. Elite programs use layered goalie metrics that separate team structure from individual performance. In this lesson we focus on goaltending performance and shot suppression metrics that help coaches read whether the team is protecting the net or hanging the goalie out to dry.

Performance Metrics Masterclass - Lesson 2: Goaltending Performance & Shot Suppression

🎯 Lesson Objective

  • Understand which goalie stats actually predict wins over a full season.
  • Separate team defense quality from individual goaltender impact.
  • Use a small set of metrics to monitor trends, not chase every number on the screen.
  • Turn data into clear coaching actions: adjust D-zone coverage, shot lanes and rebound support.

🧠 Core Concepts

We group goalie metrics into three buckets:

  • Baseline results - simple stats everyone knows.
  • Quality-adjusted metrics - how a goalie performs relative to shot quality.
  • Environment metrics - what kind of chances the team is allowing.

1. Baseline Results

Save Percentage (SV%)

  • What it is: Saves divided by shots on goal.
  • Use: Good for quick checks and long-term trends.
  • Limit: Does not care where or how shots are coming.

Goals Against Average (GAA)

  • What it is: Goals allowed per 60 minutes.
  • Use: Reflects team + goalie together.
  • Limit: Strong defensive teams can hide an average goalie.

2. Quality-Adjusted Metrics

Goals Saved Above Expected (GSAx / GSAE)

  • What it is: Expected goals against (based on shot quality) minus actual goals allowed.
  • Read: Positive number = goalie is stealing goals; negative = leaking more than model expects.
  • Coaching use: Look at trend over 5-10 games, not one bad night.

High-Danger Save Percentage (HDSV%)

  • What it is: Save percentage only on high-danger chances (slot, net-front, broken plays).
  • Read: Tells how calm and technical the goalie is when structure breaks.
  • Coaching use: If HDSV% is strong but overall SV% is poor, your problem is volume and breakdowns, not the goalie.

Rebound Control Rate

  • What it is: Percentage of shots that end the play (frozen or cleared) vs second chances allowed.
  • Read: High rebound rate = extra chaos around the net.
  • Coaching use: Work on box-outs and inside body if rebounds are inevitable; and on tracking/puck absorption in technical goalie work.

3. Environment & Shot Suppression

Slot Shots Against per 60

  • What it is: How many shots from the slot your team allows per 60 minutes.
  • Read: Direct mirror of your Defensive Zone Coverage quality.
  • Coaching use: If this number is high, you do not have a goalie problem, you have a structure problem.

Cross-Ice / East-West Chances Against

  • What it is: Passes that cross the middle of the ice before a shot.
  • Read: These are goalie killers; almost all models treat them as high-danger.
  • Coaching use: Tighten weak-side awareness, stick position and low-zone switches.

Screened Shots vs Clear Sight

  • What it is: Ratio of shots where the goalie is screened vs has a clear view.
  • Read: Great goalies still need eyes. Too many screens mean D are losing net-front body and sticks.
  • Coaching use: Track this for your top pair and your net-front forwards on the PK.

📊 Summary Table

MetricWhat it really tells youCoaching reaction
SV%Overall results over timeUse as a quick health check, never alone
GSAxGoalie impact vs shot qualityIdentify “stealing games” vs “costing games” trends
HDSV%Performance when structure breaksEvaluate composure and battle level in chaos
Rebound ControlSecond chances allowedAdjust goalie technique and D-zone box-outs
Slot Shots AgainstHow well you protect the houseRebuild D-zone coverage and inside positioning
East-West Chances AgainstSeam control and weak-side disciplineTighten switches, sticks and F3 awareness

💬 Coach Mark Lehtonen comment

Coach Mark Lehtonen says
A great goalie is a force multiplier. The numbers tell you if he is fighting the game, or if your team is making his job impossible.

❓ Questions & Answers | IHM Performance Metrics

Q: Which goalie stat should I look at first as a coach?

A: Start with save percentage and goals saved above expected over the last 5-10 games. Together they show both results and context.

Q: How do I know if the problem is my goalie or my team defense?

A: If GSAx and HDSV% are solid but you allow many slot shots and east-west chances, the issue is coverage, not goaltending.

Q: Are rebounds always the goalie’s fault?

A: No. Rebound metrics must be read together with net-front defense. If defenders lose inside body and sticks, any rebound becomes dangerous.

Q: How often should I check these metrics during the season?

A: Weekly snapshots are ideal. Daily overreaction creates noise; 5-10 game segments reveal real trends.

Q: Can minor hockey teams use advanced goalie stats?

A: Yes, in a simplified way: track shot locations, slot shots against and basic save percentage. The habits behind the numbers matter more than the software.

🧱 Lesson Takeaways

Goaltending performance is not a guessing game or a mood. Use a small, clear set of metrics-SV%, GSAx, high-danger saves, rebound control and slot shots against-to decide whether you need a new practice plan, a new D-zone structure or simply more patience with a good goalie in a bad stretch.


IHM Academy · Defensive Zone Coverage-Lesson #3

IHM Academy · Defensive Zone Coverage-Lesson #3

Strong-Side Press & Weak-Side Collapse

Elite defensive teams win by applying pressure on the strong side while securing the middle and far post with a disciplined weak-side collapse. We attack the puck where it lives and protect the ice that matters. This lesson builds a repeatable framework: press hard without opening the slot, pass off checks early, and collapse from the weak side only when danger requires it.

Hockey defensive diagram showing strong-side pressure with F1 and D2, weak-side collapse from F3 and D1, and point denial from F2 in a structured D-zone system.

🎯 Objective

  • Create 2v1 pressure on the strong side (corner/wall) to force turnovers.
  • Keep inside body position and sticks in lanes through the slot.
  • Collapse weak-side support only on danger triggers (net drive, seam threat, backdoor).
  • Convert recoveries into clean exits with middle support.

🧠 Core Principles

  • Inside first: body between your check and the net; blades angle the seam.
  • Press to contain: F1 and D2 drive the puck to the wall, then seal; no fly-bys.
  • Weak-side anchor: D1 + F3 hold middle/backdoor; collapse only on a real threat.
  • Early talk: “Hold / Switch / Bump” – switch before you lose inside position.
  • Reload fast: after the press, F1/F2 recover to the top of the box; gaps stay tight.

🧩 Roles & Responsibilities

F1 – Strong-Side Press

  • Angle toward the wall; stick on puck, body on hands.
  • Drive the carrier into D2; press → contain; no chase behind the net without a call.
  • On chip/reverse: arrive first, then reload high to restore the box.

D2 – Strong-Side Corner/Wall

  • First contact; steer plays outside the dots.
  • Close the wall; ride-and-release on switch; never open the middle.
  • Head up for low-to-high – be ready to front shots or deny the point lane.

F2 – Strong-Side Support

  • Seal the inside lane above the battle; deny slot pops.
  • Be the second stick in the trap (F1+D2+F2 triangle).
  • First outlet after recovery if puck kicks up the wall.

D1 – Net-Side / Weak-Side Safety

  • Own the crease side; box out and tie up sticks.
  • Read for backdoor threats; collapse only when the far-post attacker becomes live.
  • On possession: middle support pass → quick up or reverse.

F3 – Weak-Side High Anchor

  • Protect middle seam and far-post lane.
  • Collapse on triggers (slot pop, net drive, diagonal seam) – otherwise hold high.
  • Be the first middle option for exit when we win it.

🔁 Collapse & Switch Triggers

  • Collapse: far-post net drive • slot pop into the dots • diagonal seam with time.
  • Switch: carrier crosses the back of the net • set pick/pinch on the wall • D2 is pinned and F1 arrives inside.
  • No-switch rule: never switch off a live net-front without inside coverage.

❌ Common Mistakes

MistakeWhy it breaks coverage
F1 over-pursues below goal lineTop of box opens; high slot shot
F3 collapses without a triggerDiagonal seam becomes available
D2 rides outside and releases lateInside lane opens to the net
No inside body on switchAttacker beats the hand-off to the crease
Weak-side watches puckBackdoor tap-in

🧪 Micro-Drills

  • 2v2 Wall Trap – F1 angle + D2 seal; F2 above; turnover → middle exit.
  • Weak-Side Read – coach activates far-post stick; F3 collapses on trigger, otherwise holds.
  • Switch Behind Net – ride-and-release on reverse; D1 holds net; rebuild box in two strides.

🧱 Summary

Strong-Side Press & Weak-Side Collapse lets you hunt the puck without surrendering the slot. Pressure where the puck is. Protect where goals are scored. Communicate early, keep inside, and reload together.

📣 Coach Mark Lehtonen says

Strong-side wins the puck; weak-side protects the game.
If you chase on the strong side and sink on the weak side, you give the slot for free.


❓ Q&A – Defensive Zone Coverage

When should the weak side collapse?

Only on danger triggers: a live far-post net drive, a slot pop inside the dots, or a diagonal seam with time. Otherwise F3 stays high to protect the middle.

Who calls the switch behind the net?

D1 is the primary voice near the crease; F1 or D2 can initiate, but the release happens only when the receiving player has inside position.

What is the difference between press and chase?

Press contains with inside body and stick-on-puck, steering into help. Chase follows the puck and loses the middle-don’t chase.

How do we avoid giving up the low-to-high shot?

F2 owns the strong-side point and seals the wall release; on kick-out, recover to the box and front the shot lane.

What is the first pass on recovery?

Middle support. If the middle is closed, reverse to the weak side; never force the strong-side rim under pressure.


IHM Academy · Defensive Zone Coverage-Lesson #2

IHM Academy · Defensive Zone Coverage-Lesson #2

Low-Zone Rotation & Switch Coverage

Elite defensive teams don’t chase they rotate. In the low zone, the puck moves quickly below the dots, the cycle attempts to drag defenders out of position, and the net becomes exposed when coverage breaks. Low-Zone Rotation & Switch Coverage is the pro solution: we keep inside position, pass off checks at the right time, and rotate as a unit so the slot stays protected while pressure remains active.

Defensive hockey diagram showing Low-Zone Rotation & Switch Coverage: D1 net-side, D2 strong-side corner pressure with F1 support, early switch behind the net, F2 sealing low-to-high, F3 anchoring weak-side inside dots; arrows illustrate ride-and-release and 5-man rotation.

🎯 Objective

  • Maintain inside body position and protect the slot at all times.
  • Apply controlled pressure on the puck without losing structure.
  • Use clean, early switches to avoid pick plays and chase patterns.
  • Rotate as a 5-man unit so gaps stay tight and lanes stay closed.

🧠 Core Principles

  • Inside first: body between man and net; sticks denying the middle.
  • Strong-side overload, weak-side anchor: pressure where the puck is, stability where it isn’t.
  • Talk early: switches are called, not guessed. “Mine / Yours / Switch”.
  • Skate through the hand-off: one defender arrives before the other leaves.
  • Head on a swivel: scan net-front every 1-2 seconds during rotations.

🧩 Roles in the Low Zone

D1 – Net-Side Defender

  • Own the crease side; box out; tie up sticks.
  • Primary communicator for switches below the hashmarks.
  • If the puck reverses behind the net, bump responsibility to the next defender and reset inside.

D2 – Corner/Strong-Side Defender

  • First contact on the cycle; steer plays outside the dots.
  • When puck is chipped past, ride and release to F1 or D1 on the call.
  • Never chase behind the net without a clear switch cue.

F1 – Low Support (+1)

  • Help close the strong-side wall; create 2v1 pressure with D2.
  • On reverse or pop, arrive first to eliminate time.
  • Reload to the top of the box when puck exits the corner.

F2 – Strong-Side High

  • Seal the strong-side point and deny low-to-high outlets.
  • Collapse to hashmarks when puck drops below the goal line.
  • First stick in the high seam on any slot threat.

F3 – Weak-Side High (Anchor)

  • Hold middle ice; protect backdoor and far-post seam.
  • Tracks the weak-side winger drifting into the slot.
  • First outlet on recovery: middle support for clean exit.

🔁 Switch Rules (Low-Zone Hand-Offs)

  1. Call it early: “Switch!” as the puck carrier crosses the back of the net or hits a pick/pinch point.
  2. Arrive before release: receiving defender must have inside position before the original checker lets go.
  3. Inside over speed: never cross outside the dots to chase – take the inside lane and meet.
  4. Net-front priority: if in doubt, don’t switch off net-front without coverage.
  5. Immediate reset: after switch, scan and rebuild the box; do not watch the puck.

📣 Bench/On-Ice Communication

  • “Hold / Switch / Bump” – universal triggers for all five players.
  • “Middle!” – F3 call identifying slot or back-post threat.
  • “Low-High!” – warning about a low-to-high play; F2 steps up.

❌ Common Mistakes

MistakeWhy it breaks coverage
Late or silent switchBoth chase; slot opens; free net-front touch
D2 chases behind the netLoss of strong-side, easy wrap or jam
F1 doesn’t reloadTop of box empty → high slot shot
Weak-side collapse by F3Backdoor seam available
No inside body on hand-offAttacker beats switch to the net

🧪 Micro-Drills

  • 2v2 Corner Cycle → Switch – D2 engages, F1 supports, call early switch behind net; D1 restores net-front.
  • Reverse Read Series – coach rims/reverses; team practices ride-and-release with inside lanes.
  • Low-to-High Denial – F2 seals point; on kick out, recover to box and block high seam.

🧱 Summary

Low-Zone Rotation & Switch Coverage keeps the puck to the outside, denies the slot, and shuts down the cycle without panic. We don’t chase-we pass off, we rotate, and we reset with five players connected inside the dots.

Coach Mark Lehtonen
Low-zone defense fails when players chase. It wins when players rotate. You don’t defend the puck – you defend the middle. If the slot stays protected, everything else becomes a battle we can live with.


❓ Q&A – Low-Zone Rotation & Switch Coverage

Q1: What is the main purpose of low-zone rotation?

A: To maintain inside positioning while applying pressure without chasing. Rotation keeps defenders connected, preserves the slot, and eliminates openings created by the cycle.

Q2: When should a switch be called below the goal line?

A: Early – as the puck carrier crosses behind the net or approaches a pick-point. Late switches create two-man chases and expose the middle.

Q3: Who initiates most low-zone switches?

A: D1 (net-side defender). D1 controls crease coverage and usually has the clearest view of incoming threats, reverses, and pick plays.

Q4: What is the biggest mistake forwards make in this system?

A: F1 failing to reload to the top of the box. When F1 stays too deep, the high slot becomes open for a shot or seam attack.

Q5: What is the weak-side forward’s primary job?

A: F3 protects the middle lane and far-post threat. F3 should never collapse without purpose – his job is to eliminate backdoor options.

Q6: How do you avoid getting picked or screened during switches?

A: Take inside routes, keep your stick pointed at the middle, and communicate early. “Inside first, body second” prevents attackers from using picks to create separation.

Q7: When does D2 join pressure instead of holding position?

A: Only when the puck is firmly on the strong-side and F3 has the middle lane sealed. If D2 jumps early, the weak side collapses and opens a backdoor threat.

Q8: What should the team do immediately after a successful switch?

A: Reset the box shape and scan. Players often relax after a switch – but the danger usually comes from the next play, not the first one.